No Churn Salted Caramel Ice Cream
This post may contain affiliate links.

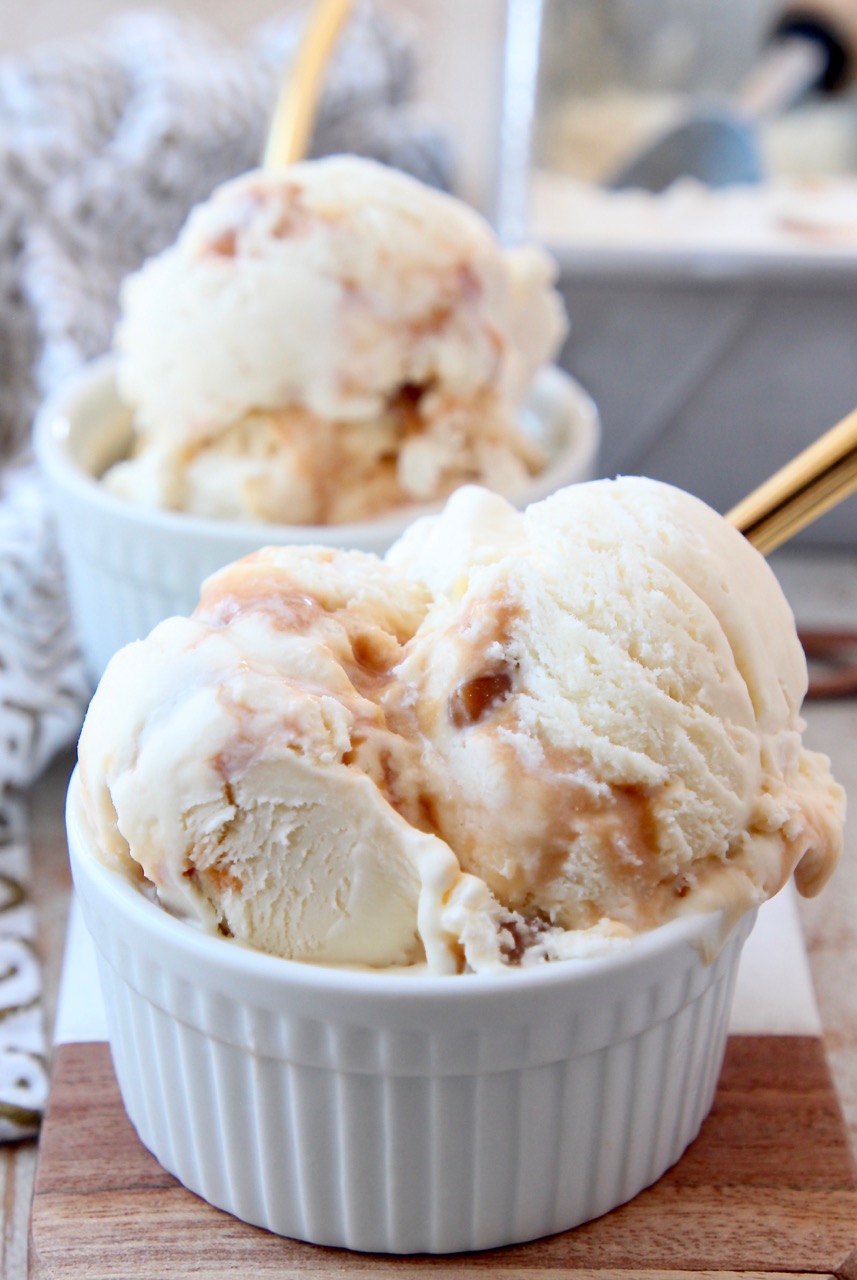
Learn how to make THE BEST Salted Caramel Ice Cream without an ice cream maker! This no churn recipe is easy to make and totally delicious! Incredibly creamy ice cream, with thick swirls of salted caramel, this will quickly become your new favorite dessert recipe!
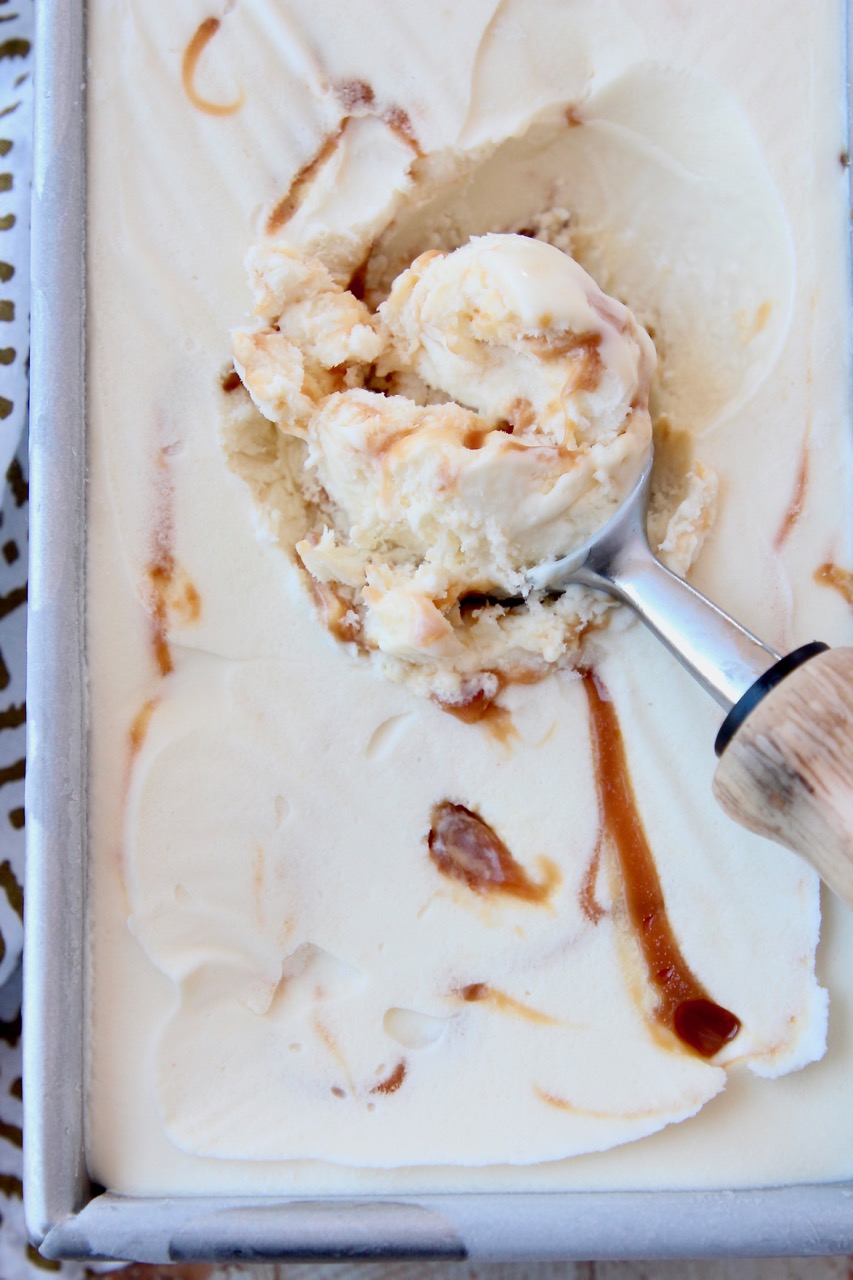
Table of contents
After perfecting my homemade no churn ice cream recipe back in 2015, I’ve been on a mission to make no churn ice cream in all of my favorite flavors! This salted caramel recipe was modeled after one of my all-time favorite ice cream flavors, Salt and Straw’s Sea Salt with Caramel Ribbons.
The key to their ice cream is the ribbons of gooey salted caramel swirled throughout the ice cream. With every spoonful, you get a bite of salty, caramel goodness and it’s just so good when it hits your tongue! I knew that I had to recreate those ribbons of caramel deliciousness at home.
Luckily with my easy no-churn ice cream method, it only takes 15 minutes of prep time and 6 ingredients to recreate this recipe! And you don’t need an ice cream maker, so literally anyone can make this ice cream at home!
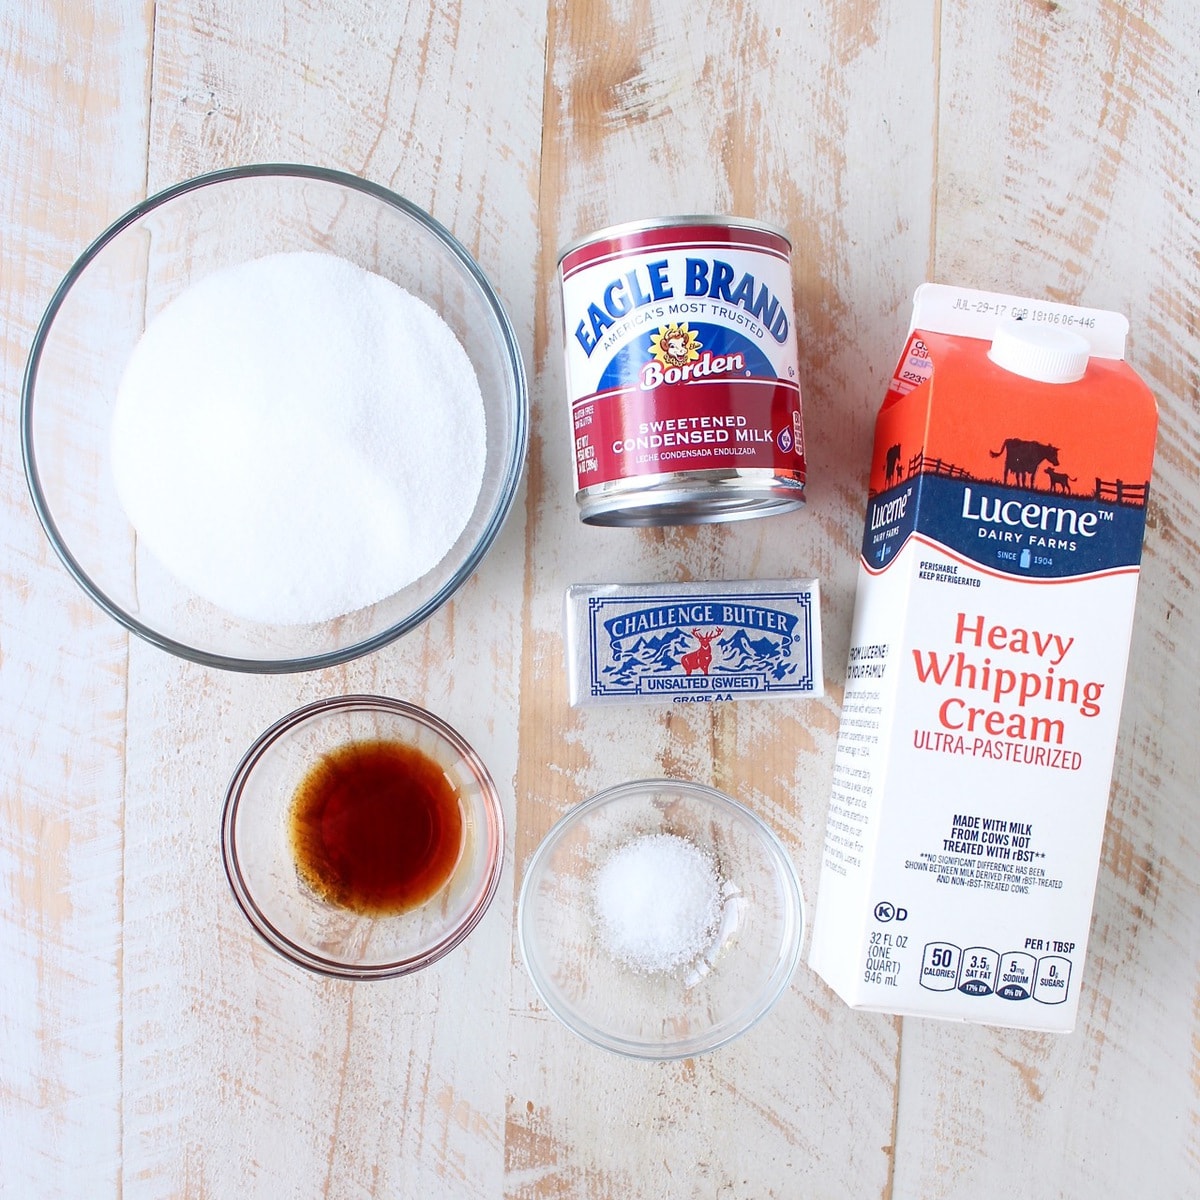
Ingredients
- Granulated sugar
- Butter – I recommend using unsalted butter, because you’ll be adding salt to the caramel sauce. If you only have salted butter on hand, I recommend cutting the amount of salt in the caramel in half.
- Heavy cream – I do not recommend using anything besides heavy cream to make this recipe. Alternative milks, like almond or soy milk, or 2% milk will not whip up into whipped cream. And this is what’s needed to make this ice cream freeze up creamy and delicious!
- Sea salt
- Sweetened condensed milk – this canned milk can be found on the baking aisle at all major grocery stores.
- Vanilla extract
Instructions
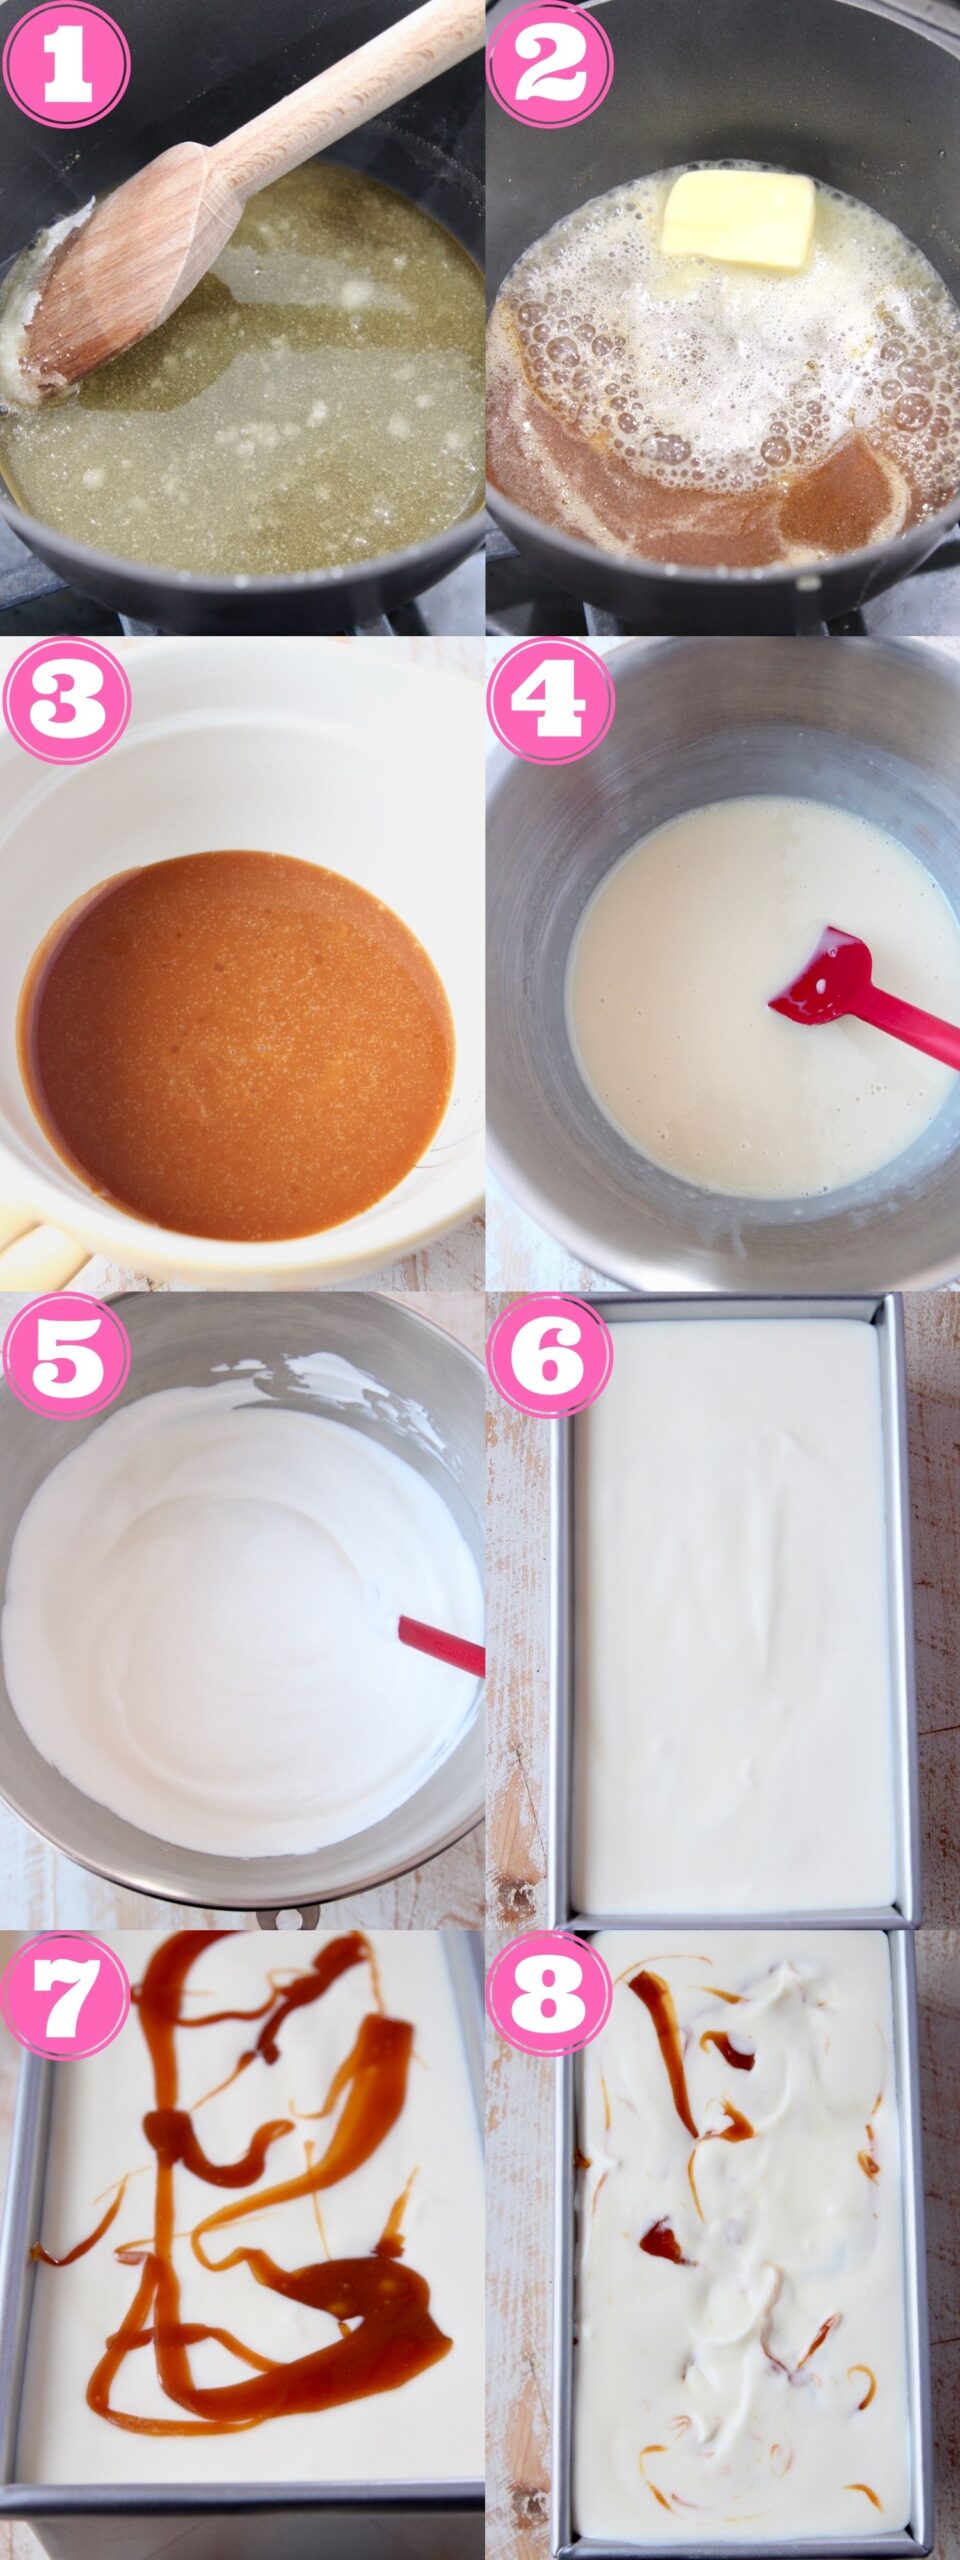
- Heat the sugar in a small saucepan over medium heat, stirring constantly with a wooden spoon until it turns into an amber-colored liquid.
- Once the sugar is completely melted, stir the butter into the caramel until it is completely melted, about 2-3 minutes.
- Slowly, drizzle in ¼ cup of heavy cream while stirring constantly. Allow the mixture to boil for 1 minute. Remove from the heat, transfer to a heat-safe bowl and stir in the salt.
- In the meantime, combine a can of sweetened condensed milk and vanilla extract in a medium bowl, set aside.
- Use a stand mixer, or electric hand mixer, to whip the heavy cream on medium-high speed until form peaks form, about 3-4 minutes.
- Note: You can also hand whip the heavy cream if you don’t have a mixer at home. This will also provide you with a great arm workout!
- Fold the condensed milk mixture into the whipped cream with a rubber spatula until combined. Transfer to a 2 quart container, preferably metal, a 1 pound metal loaf pan is perfect for this.
- Use a spoon to drizzle the salted caramel over the ice cream.
- Use the same spoon to swirl the caramel throughout the ice cream. Cover and freeze for 5 hours, or overnight.
Recipe tips
- Freezing the ice cream in a metal container will make it freeze faster. If you want your salted caramel ice cream ASAP, pour the ice cream into a metal container to freeze.
- Place the ice cream as far back in the freezer as you can for a quicker freeze. You never want to store ice cream in the door, as it is the warmest place in the freezer. But I have also found for homemade ice cream, the further back in the freezer you place it, the quicker it will freeze.
- This recipe makes approximately 1/2 gallon of ice cream, which equals 4 pints, or 12 scoops of ice cream.
- Do NOT make substitutions. This recipe works perfectly with the simple combination of heavy cream and sweetened condensed milk. Substituting either of these ingredients can vary the final result of the ice cream taste and texture.
- Use a wet ice cream scoop to scoop out the ice cream after it’s frozen. I actually learned this trick at my first job, working at a frozen custard shop. A wet ice cream scoop means the ice cream will come out of the scoop and into your bowl much easier!
Frequently asked questions
- Is salted caramel ice cream gluten free? Yes, this recipe is naturally gluten free.
- What should I serve with salted caramel ice cream? I like to eat this ice cream straight from the bowl… or the container, let’s be honest! But you could also pair it with these Sea Salt Chocolate Chunk Cookies for the most epic ice cream sandwiches ever! Or pair it with these Sea Salt Blondies for a sweet and salty ice cream sundae! I also like to serve it on top of this Caramel Apple Dump Cake during the fall months.
- How long will this ice cream stay good in the freezer? This ice cream will stay good in the freezer for 6 months. Always seal the ice cream in an airtight container to avoid freezer burn. I like to use these glass containers to store the ice cream. This recipe will perfectly fit into two of these containers.

More no churn ice cream recipes
Stock up your freezer with all of your favorite ice cream flavors! Be sure to check out each of these ice cream recipes, all easy to make without an ice cream maker!
- Peanut Butter Ice Cream
- Moose Tracks Ice Cream
- Cherry Garcia Ice Cream
- Strawberry Ice Cream
- Milk & Cookies Ice Cream
- Peppermint Bark Ice Cream
- Chocolate Ice Cream
- Apple Pie Ice Cream
More salted caramel recipes to try
Want more salted caramel in your life? Because who doesn’t! Try all of these popular salted caramel recipes!
- Salted Caramel Cinnamon Rolls
- Salted Caramel Pecan Monkey Bread
- Pumpkin Cookie Cups with Salted Caramel Filling
- Salted Caramel Pecan Baked Brie
- Salted Caramel Cashew Cookies

No Churn Salted Caramel Ice Cream
Ingredients
- ½ cup granulated sugar
- 3 tablespoons butter
- 2 ¼ cups heavy cream, divided
- 1 teaspoon sea salt
- 14 ounce can sweetened condensed milk
- 1 tablespoon vanilla extract
Instructions
- Heat the sugar in a small saucepan over medium heat, stirring constantly with a wooden spoon until it turns into an amber-colored liquid.
- Once the sugar is completely melted, stir the butter in until it is completely melted, about 2-3 minutes.
- Slowly, drizzle in ¼ cup of heavy cream while stirring constantly.
- Allow the mixture to boil for 1 minute.
- Remove from the heat, transfer to a heat-safe bowl and stir in the salt.
- In the meantime, combine a can of sweetened condensed milk and vanilla extract in a medium bowl, set aside.
- Use a stand mixer, or electric hand mixer, to whip the heavy cream on medium-high speed until form peaks form, about 3-4 minutes.
- Fold the condensed milk mixture into the whipped cream with a rubber spatula until combined.
- Transfer to a 2 quart container, preferably metal, a 1 pound metal loaf pan is perfect for this.
- Use a spoon to drizzle the salted caramel over the ice cream, then swirl the caramel throughout the ice cream.
- Cover and freeze for 5 hours, or overnight.
Notes
- Freezing the ice cream in a metal container will make it freeze faster. If you want your salted caramel ice cream ASAP, pour the ice cream into a metal container to freeze.
- Place the ice cream as far back in the freezer as you can for a quicker freeze. You never want to store ice cream in the door, as it is the warmest place in the freezer. But I have also found for homemade ice cream, the further back in the freezer you place it, the quicker it will freeze.
- This recipe makes approximately 1/2 gallon of ice cream, which equals 4 pints, or 12 scoops of ice cream.
- Do NOT make substitutions. This recipe works perfectly with the simple combination of heavy cream and sweetened condensed milk. Substituting either of these ingredients can vary the final result of the ice cream taste and texture.
- Use a wet ice cream scoop to scoop out the ice cream after it’s frozen. I actually learned this trick at my first job, working at a frozen custard shop. A wet ice cream scoop means the ice cream will come out of the scoop and into your bowl much easier!
- This recipe is naturally gluten free.
- This ice cream will stay good in the freezer for 6 months. Always seal the ice cream in an airtight container to avoid freezer burn. I like to use these glass containers to store the ice cream. This recipe will perfectly fit into two of these containers.
Nutrition Facts
We are a participant in the Amazon Services LLC Associates Program, an affiliate advertising program designed to provide a means for sites to earn advertising fees by advertising and linking to amazon.com.


3 Comments on “No Churn Salted Caramel Ice Cream”
Yum!!! Salted caramel anything is welcome in my mouth!!
Great recipe! So simple and didn’t know you could make this without an ice cream maker. Thanks for sharing!
Of course, so happy you enjoyed it!